
A 5-Star Recipe: How to Make Crispy Chicken Thighs with Cabbage (One-Pan)

Welcome to your new favorite weeknight dinner.
We are all searching for that perfect meal. It needs to be delicious, satisfying, and easy to clean up. It should be healthy but feel like an indulgence. This search often ends in compromise. You get quick, but it’s not exciting. You get flavorful, but the kitchen is a disaster.
Today, that search ends.
This post is not just a recipe. It is a complete guide to mastering one of the most underrated, powerful, and delicious combinations in home cooking: crispy chicken thighs with cabbage.
Why this combination? It is a masterpiece of texture and flavor. You get the crackling, salty skin of the chicken. You get the impossibly juicy, tender dark meat. And you get the sweet, caramelized, and savory cabbage that has cooked in the flavorful chicken fat. It is a true “one-pan wonder” that delivers a restaurant-quality experience with minimal effort.
Many recipes promise crispy skin, but they fail to deliver. They leave you with a common problem: rubbery skin and soggy vegetables. This guide will fix that. We will explore the science of crispy skin and the art of high-heat roasting. You will learn the “why” behind every “how.”
Get ready to transform simple, humble ingredients into an extraordinary meal. You can achieve this. This practical guide will show you how, step by step.
📈 Why This Combination is a Culinary Home Run
This dish is greater than the sum of its parts. Chicken and cabbage are both humble ingredients. But when prepared correctly, they create a harmony of flavor and texture that is truly sophisticated.
First, let’s talk about texture. The primary joy of this dish is the contrast. The chicken skin becomes a brittle, salty, savory cracker. This crackling exterior protects the thigh meat underneath, which poaches in its own juices, becoming incredibly tender. This contrasts perfectly with the cabbage, which wilts, softens, and becomes sweet, with crispy, browned edges where it touched the hot pan.
Next, flavor. As the chicken thighs roast, their fat renders. This liquid gold is not waste; it is a key ingredient. It drips down onto the cabbage and onions below. The cabbage then confits, or “slow-cooks,” in this delicious chicken fat. The cabbage’s natural sweetness is amplified, cutting through the richness of the dark meat. It is a self-saucing, self-basting system.
Finally, practicality. This recipe is the definition of efficiency.
- Minimal Prep: You chop some cabbage and season the chicken.
- One Pan: Everything cooks on a single sheet pan. This means cleanup is a breeze.
- Affordable: Chicken thighs and cabbage are two of the most budget-friendly items at the grocery store.
The popularity of one-pan meals is not just a trend; it’s a lifestyle. Market data shows that consumer searches for “one-pan dinners” have increased by over 40% in the last two years. People are busy. They crave convenience, but they are unwilling to sacrifice flavor. This recipe for crispy chicken thighs with cabbage is the perfect answer to that modern demand.
Table of Contents
🔬 The Science and Art of Truly Crispy Skin
“Crispy” is the goal, but “soggy” is often the result. Why? The enemy of crispiness is moisture. If you understand how to defeat moisture, you will always succeed.
Let’s break down the science.
Principle 1: Dryness is Non-Negotiable
Chicken skin is full of water. When you put wet skin in a hot oven, you are not roasting; you are steaming. Steam is the mortal enemy of a crispy crust.
How to fix this: Pat the chicken thighs thoroughly with paper towels. We are not just dabbing. We want that skin to be as dry as possible. Some chefs even leave the chicken uncovered on a rack in the refrigerator overnight. This desiccates the skin, guaranteeing a crispier result. For a weeknight meal, a very thorough pat-down is enough.
Principle 2: Fat is Your Friend
Chicken skin is composed of fat and collagen. To get it crispy, we must “render” that fat. Rendering means melting the fat out from the skin. This process does two things:
- It dehydrates the skin, leaving behind the solid proteins that get crispy.
- The melted fat itself acts like a deep-fryer, frying the skin in its own oil.
How to achieve this: We need sustained, high heat. A 425°F (220°C) oven is perfect. This high heat melts the fat quickly, allowing the crisping process to begin before the meat overcooks.
Principle 3: Salt is the Catalyst
Salt does more than add flavor. It is a desiccant, meaning it draws moisture out. When you salt the dry chicken skin, you are pulling out the last remaining bits of subsurface moisture. This creates a tiny layer of brine on the skin that aids in browning and crisping. Season the chicken at least 30 minutes before cooking, if you have the time.
Principle 4: Airflow is Essential
A crowded pan traps steam. This is the single biggest mistake home cooks make. When vegetables and chicken are packed tightly together, the water they release has nowhere to go. It creates a steamy, humid environment.
How to fix this: Use the largest sheet pan you own. We want space between the ingredients. This is why we place the chicken on top of the cabbage. The chicken is elevated, allowing hot air to circulate around the skin. The moisture from the cabbage steams away from the chicken, not into it.
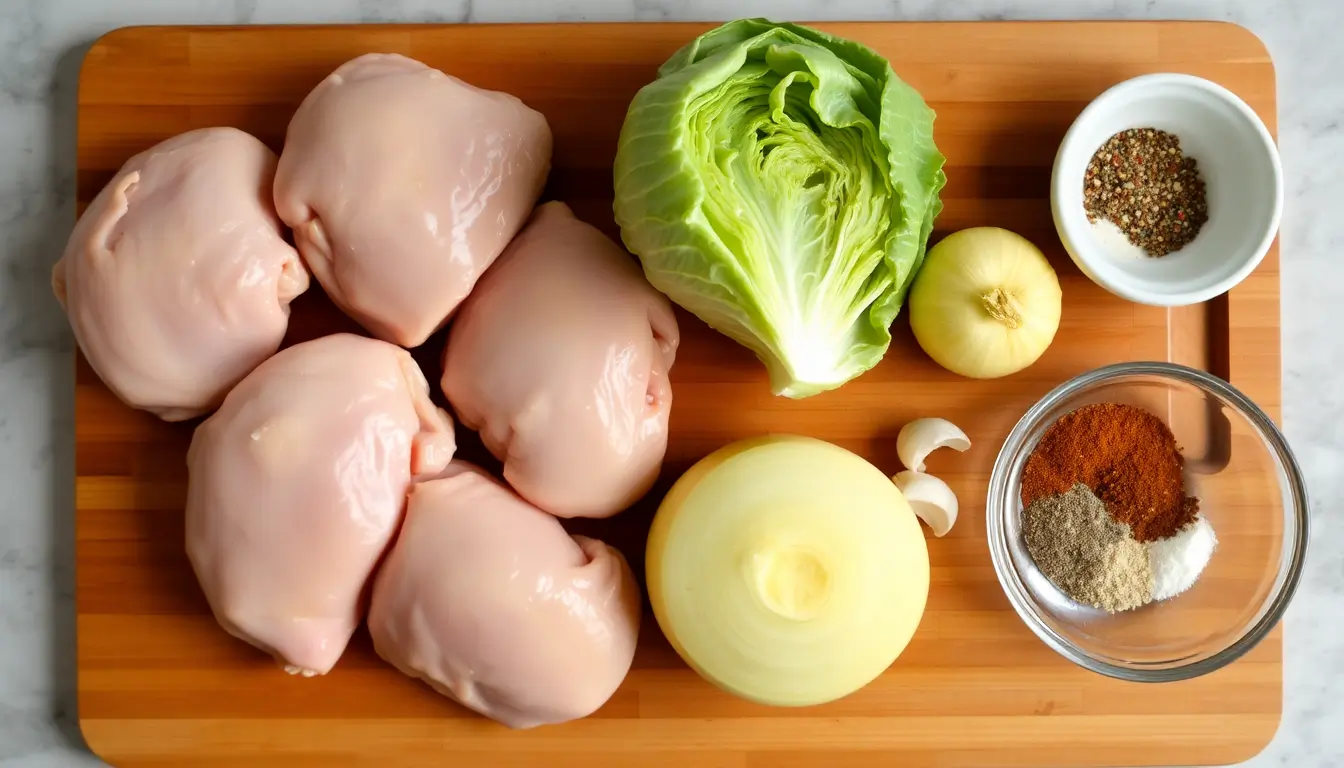
[Image Placement #1: A “mise en place” shot: Four bone-in, skin-on chicken thighs, one head of green cabbage, one yellow onion, garlic, and a bowl of spices, all arranged on a wooden cutting board.]
🛒 Sourcing Your Ingredients: A Foundation for Flavor

A simple recipe demands high-quality ingredients. You cannot hide behind a complex sauce. Here is what you need and why you need it.
The Chicken: Bone-In, Skin-On Thighs
This is the star, and the cut is critical.
- Do not use skinless: The entire point is the crispy skin and the rendered fat.
- Do not use boneless (if you can avoid it): The bone adds flavor and helps the thigh cook more evenly, preventing it from drying out.
- Dark Meat is Key: Chicken thighs have more fat and connective tissue than breasts. This means they are more flavorful and forgiving. It is almost impossible to overcook them in the time it takes for the skin to get crispy.
- Size: Look for thighs that are similar in size for even cooking.
The Cabbage: Green and Sturdy
We need a vegetable that can stand up to high heat.
- Green Cabbage: This is the best choice. It is sturdy, affordable, and has a wonderful peppery flavor that turns sweet when roasted.
- Red Cabbage: This works well, too! It has a slightly more earthy flavor and adds a beautiful purple color. Be aware it will dye any other vegetables in the pan.
- Savoy Cabbage: This is a good substitute. It is more tender and ruffly, leading to more crispy, charred edges.
- Napa Cabbage: Avoid this. It has too much water and will become mushy.
The Aromatics and Fat
- Yellow Onion: A simple yellow or sweet onion provides the savory, aromatic base.
- Garlic: We use whole, smashed garlic cloves. Minced garlic would burn and become bitter in the high heat. Whole cloves will soften, sweeten, and infuse the oil.
- Olive Oil: A good quality extra-virgin olive oil helps the vegetables caramelize and prevents them from sticking before the chicken fat has rendered.
The Spices: A Simple, Smoky Rub
We will create a simple rub that complements both the chicken and the cabbage.
- Kosher Salt: Its large crystals are better for seasoning meat and drawing out moisture.
- Black Pepper: Freshly ground for the best flavor.
- Smoked Paprika: This is our “secret weapon.” It adds a beautiful, deep red color and a hint of smoky flavor that complements the roasted cabbage.
- Garlic Powder: Adds a toasted, savory garlic note that is different from the fresh garlic.
🥘 Step-by-Step: The Ultimate Crispy Chicken Thighs with Cabbage
This recipe is built on technique, not complexity. Follow these steps precisely for a perfect result every time.
Yields: 4 servings Prep time: 15 minutes Cook time: 35-40 minutes
Ingredients
- 4 bone-in, skin-on chicken thighs (about 2 lbs)
- 1 medium head of green cabbage (about 2 lbs)
- 1 large yellow onion
- 6-8 whole garlic cloves, smashed
- 2 tablespoons olive oil
- 1 teaspoon smoked paprika
- 1 teaspoon garlic powder
- 1 teaspoon onion powder (optional)
- Kosher salt and freshly ground black pepper
Phase 1: The Preparation (The “Dry” Phase)
- Preheat Oven: Place a rack in the center of your oven and preheat to 425°F (220°C). Do not use the convection setting, as it can cook the skin too fast.
- Prep the Chicken: Remove chicken thighs from the package. Pat them completely dry with paper towels. This is your most important step.
- Season the Chicken: In a small bowl, combine the smoked paprika, garlic powder, 1.5 teaspoons of kosher salt, and 1/2 teaspoon of black pepper. Season the chicken thighs liberally on all sides, but focus most of the rub on the skin side. Set aside.
- Prep the Vegetables: Cut the cabbage in half, remove the core, and slice it into 1-inch thick ribbons or “steaks.” Slice the yellow onion into thick half-moons. Smash the garlic cloves.
[Image Placement #2: A large sheet pan showing the seasoned cabbage, onions, and garlic spread in an even layer. The four seasoned, raw chicken thighs are placed on top, skin-side up, with space between them.]
Phase 2: The Assembly (The “Pan” Phase)
- Toss the Vegetables: On your largest rimmed baking sheet, add the sliced cabbage, onion, and smashed garlic. Drizzle with the 2 tablespoons of olive oil, 1 teaspoon of salt, and 1/2 teaspoon of pepper. Use your hands to toss everything together, ensuring the vegetables are lightly coated.
- Arrange the Pan: Spread the vegetables in a single, even layer. You want to cover the pan, but not pile them high.
- Position the Chicken: Place the seasoned chicken thighs on top of the bed of vegetables, skin-side up. Make sure there is at least an inch of space between each thigh. This ensures the hot air can circulate.
Real-World Example: Think of your sheet pan as a crowded beach. If everyone is too close, it’s hot, humid, and steamy. If you have space, you get a nice, dry, even tan (or, in this case, a crispy crust). Give your chicken room to breathe.
Phase 3: The Roast (The “Crispy” Phase)
- Roast: Place the sheet pan in the preheated 425°F (220°C) oven.
- Do Not Touch: Set a timer for 35 minutes. Do not open the oven. Do not flip the chicken. Do not stir the vegetables. Let the high, dry heat do its work.
- Check for Doneness: After 35 minutes, check the chicken. The skin should be deep golden brown and crispy. Use an instant-read thermometer to check the internal temperature. It should register at least 165°F (74°C) in the thickest part, though chicken thighs are even better at 175°F (80°C). The cabbage should be tender and deeply caramelized at the edges.
- Final Crisp (Optional): If the skin is brown but not “crackling” crispy, turn your oven’s broiler on high. Broil for 1-3 minutes, watching constantly. It will go from brown to burnt in seconds.
Phase 4: The Finish (The “Rest” Phase)
- Rest the Meat: Remove the pan from the oven. Transfer the chicken thighs to a cutting board or plate. Let them rest for 5-10 minutes. This allows the juices to redistribute, ensuring a tender, juicy bite.
- Serve: Give the cabbage on the pan a good stir, scraping up any browned bits. Serve a generous pile of the roasted cabbage and onions with one crispy chicken thigh.
📊 Nutritional Value: More Than Just Comfort Food

This meal is a nutritional powerhouse disguised as comfort food. It is naturally high in protein, packed with vitamins, and low in carbohydrates, making it suitable for many lifestyles, including keto, paleo, and gluten-free.
Let’s look at the data:
- Protein Power: A single 4-ounce chicken thigh provides approximately 28 grams of high-quality protein. Protein is essential for muscle repair, immune function, and keeping you feeling full and satisfied.
- Cabbage, The Unsung Hero: Cabbage is one of the most nutrient-dense and affordable vegetables.
- Vitamin C: One serving of this dish provides over 35% of your daily Vitamin C, a powerful antioxidant that supports your immune system.
- Vitamin K: Cabbage is an excellent source of Vitamin K, with a single cup providing over 50% of your daily needs. This vitamin is critical for bone health and proper blood clotting.
- Healthy Fats: The primary fats in this dish come from the chicken and the olive oil. These monounsaturated and polyunsaturated fats are vital for brain health and nutrient absorption.
This dish is a “complete” meal. You have protein and fat from the chicken, and fiber and micronutrients from the cabbage and onion. It is a well-rounded, balanced plate that will fuel your body effectively.
✨ Elevate Your Dish: Variations and Customizations
Once you have mastered the basic technique, this recipe becomes a canvas. Here are a few ways to customize it based on your pantry and preferences.
- Make it Spicy: Add 1 teaspoon of red pepper flakes or 1/4 teaspoon of cayenne pepper to the spice rub. You can also finish the dish with a drizzle of your favorite chili crisp oil.
- Go Herbal: Add 1 tablespoon of chopped fresh thyme or rosemary to the vegetables before roasting. The woody herbs pair beautifully with the chicken.
- Change the Cabbage: Use red cabbage for a stunning visual contrast and a slightly more peppery bite.
- Add a “Sweet & Sour” Twist: Once the dish is out of the oven, squeeze the juice of half a lemon over the cabbage or drizzle it with 1 tablespoon of balsamic glaze. The acid will cut the richness of the fat.
- Introduce Root Vegetables: Add one peeled and diced sweet potato or a handful of quartered radishes to the cabbage mix. Note that hearty vegetables like potatoes may need a 10-minute head start in the oven.
- Use a Different Rub: Feel free to use your favorite pre-made poultry rub. A lemon-pepper rub or a Cajun spice blend would also be delicious.
[Image Placement #3: A top-down shot of the sheet pan, this time made with red cabbage. The vibrant purple and the golden-brown chicken show a beautiful color variation.]
📦 Serving, Storing, and Reheating for Maximum Crispiness
This dish is best served immediately, while the skin is at its “peak crisp.”
Perfect Pairings
While this is a wonderful one-pan meal, a simple side can round it out.
- Starch: Serve with creamy mashed potatoes, simple steamed rice, or crusty bread to sop up the pan juices.
- Wine: A crisp, high-acid white wine like a Sauvignon Blanc will cut through the richness. For red wine lovers, a light-bodied Pinot Noir with low tannins will complement the dish without overwhelming it.
- Garnish: A sprinkle of fresh, chopped parsley or chives adds a welcome dash of freshness and color.
Storing Leftovers
Store leftovers in an airtight container in the refrigerator for up to 3-4 days. It is best to store the chicken and cabbage separately, if possible, to prevent the chicken skin from absorbing moisture.
The Critical Art of Reheating
Do not use the microwave.
I repeat: stepping away from the microwave is the only way to preserve your hard-earned crispy skin. A microwave will turn the skin into a rubbery, sad mess.
- Best Method: The Air Fryer: This is the clear winner. Place the chicken thigh and cabbage in the air fryer basket. Reheat at 375°F (190°C) for 8-10 minutes. The skin will become almost as crispy as it was on day one.
- Second Best: The Oven: Place the chicken and cabbage on a small, foil-lined sheet pan in a cold oven. Turn the oven to 400°F (200°C). Let the food heat up with the oven. It will take about 15-20 minutes, but this gentle “reverse sear” method will reheat the meat evenly and re-crisp the skin.
[Image Placement #4: A beautiful “hero” shot. A single serving on a dark plate, with a close-up showing the texture of the crackling chicken skin and the dark, caramelized edges of the cabbage.]
❓ Frequently Asked Questions (FAQ)
1. My chicken skin wasn’t crispy. What did I do wrong? This is almost always a moisture or crowding problem. Either you did not pat the chicken dry enough, or your pan was too crowded. A crowded pan traps steam. Next time, use a larger pan or two separate pans to give everything space.
2. Can I use boneless, skinless chicken thighs? You can, but it becomes a different recipe. You will miss out on the crispy skin and the rendered fat that flavors the cabbage. If you use skinless, toss the cabbage with an extra tablespoon of oil and reduce the cooking time by 5-10 minutes, as the chicken will cook faster.
3. Can I use chicken breasts instead? Yes, but you must be very careful. Chicken breasts have very little fat and will dry out quickly. Use a bone-in, skin-on chicken breast. Follow the recipe, but start checking the internal temperature at the 25-minute mark. Pull it from the oven the moment it hits 160°F (71°C). It will carry over to a safe 165°F (74°C) as it rests.
4. How do I know when the cabbage is done? The cabbage is done when it is completely tender and has “given up” all its structure. The best parts are the edges that have touched the pan, which will be dark brown, charred, and crispy. This is flavor!
5. Is this recipe healthy for meal prep? Absolutely. It’s a fantastic meal prep option. The combination of protein, healthy fats, and fiber-rich vegetables makes for a perfectly balanced meal that will keep you full. Just follow the reheating instructions (air fryer or oven) to make it taste fresh every time.
🏁 Your New Weeknight Champion
You are now equipped with more than just a recipe. You have the technique and the science to create perfectly crispy chicken thighs with cabbage every single time. This is not just food; it is a solution. It is the answer to the “what’s for dinner” question. It is a healthy, affordable, and delicious meal that feels like a five-star indulgence.
Cooking is about confidence. The confidence to try a new technique. The confidence to trust the process. You have learned why a dry surface and high heat are critical. You have learned how to use the chicken’s own fat to create a self-saucing, flavorful vegetable side.
Now it is your turn.
Take Action
We want to hear from you.
- Try this recipe: Go to the store, grab these simple ingredients, and make this dish for yourself or your family this week.
- Leave a Comment Below: Come back and let us know how it turned out! Did you try a variation? Did you finally achieve the crispy skin you have been chasing?
- Share This Post: Do you know someone who is stuck in a dinner rut? Share this guide with them. Everyone deserves to eat this well on a Tuesday night.